Wallets
Before you can enter the wide world of Web3 applications you need to install a wallet application that is Web3 compatible. On blockchains, your identity, address, and bank are all tied to a pair of cryptographic keys. The public key is your public wallet address on the blockchain. Anyone can send ETH or tokens to your wallet, and you can send ETH or interact with smart contracts by signing transactions with your private key. The most important thing to remember is keep your private key safe! There is no bank or organization that can help you if loose or leak your private key. Your funds will be gone. That’s why it’s very important to follow best practices and write down your passphrase on paper when setting up your wallet. If it’s never in your computer, phone, photos, or anything digital then it can’t be hacked, and it will be much harder to be tricked into giving it to someone.
Installing MetaMask
There are many Web3 wallets, but the gold standard is MetaMask, which a free browser extension that is fairly user-friendly. So this tutorial will walk you through setting up MetaMask.
Funding Your Wallet With Ether
Once your MetaMask Wallet is set up, it’s time to go purchase some Ethereum so that you can get busy buying, selling and trading NFTs. Ethereum is the main cryptocurrency of the Ethereum blockchain network, which powers other tokens and decentralized apps through smart contracts. In order to perform any transactions on the Ethereum network, you have to pay a fee known as “gas” which is paid to the miners (thousands of servers around the world running the blockchain) as an incentive for them to pickup and process your transaction. Gas prices are dynamic and vary widely based on how busy the network is. With the popularity of Web3 and Ethereum, gas has been getting quite expensive at busy times. It can literally pay to wait to do your transactions on mornings and weekends when gas prices are low.
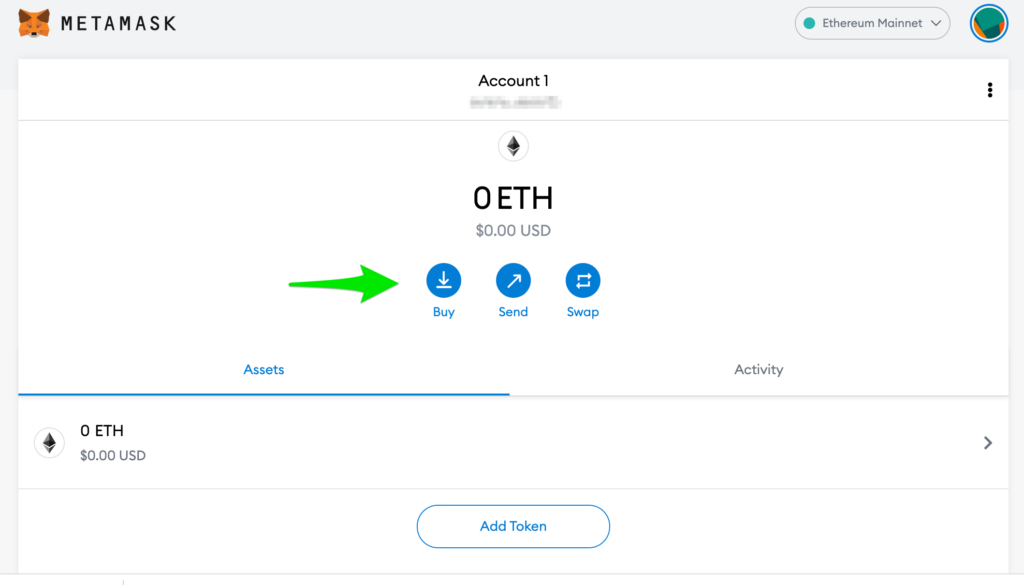
Buy in MetaMask
If you are brand new to cryptocurrencies, then probably the simplest way to purchase some ETH with your local currency and deposit it into your wallet is to use the built in “Buy” button in MetaMask. This will direct you to some of their partner companies that allow you to purchase using a Debit card. Simply click the button and follow the directions to make your purchase. Note that these partner companies might not support users from every country/state due to various regulations. If they don’t work for you keep reading.
Transfer From an Exchange
A more traditional way to purchase ETH and other cryptocurrencies is by using a centralized exchange. These may have lower fees, and support accounts from more jurisdictions. Some of the most well known and trusted are:
Exchanges have high security, insurance, and other protection methods to try to keep your funds safe. They are also very easy to use using their apps and websites, and they tend to have the lowest fees for converting cryptocurrencies back and forth to your local currency. However, to do this they work more like a traditional bank. They own the wallet and private keys, and you have to trust them to keep that safe.
Most importantly when your funds are in an exchange then you are not able to use them to interact with the world of Web3 applications. So once you purchase Ether (ETH) in an exchange, you will still need to setup a Web3 wallet like MetaMask, then transfer or withdraw your ETH from the exchange to your wallet address. How you do this will depend on your exchange, but it might look something like this:
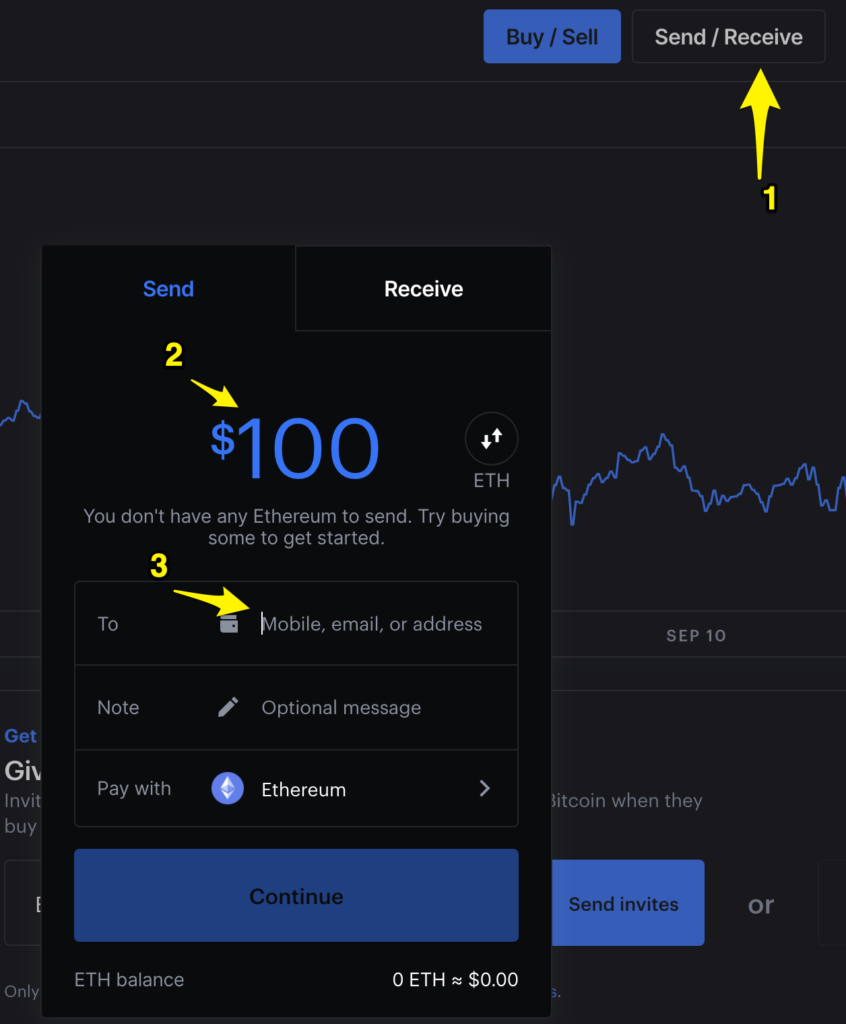

First choose Send/Withdraw/Transfer, then enter the amount to send to your wallet. If you want to purchase one Wapuu NFT then we recommend at least 0.03-0.04 ETH to cover the mint fee and gas fees. Finally you will enter the public address of your wallet! This can be found prominently in your wallet application with an easy way to copy it or generate a QR code to scan with your exchange mobile app.
Once you’ve entered your wallet address you can go ahead and initiate the transfer. Your exchange should give you an estimate of how long it will take, but usually it’s at most a few minutes before your ETH will appear in your MetaMask wallet balance! Note that most exchanges will have a holding period when you purchase cryptocurrency before they will allow you to transfer it out of the exchange. This is to cover them in case there is a problem with a payment from your bank or debit card. So it’s important to do this ahead of time so you will have liquid funds to purchase your Wapuu while they are still available!
Summary
Whoo, that was fun! But I promise that was most of the battle. Once you have your wallet setup and funded then you are ready to explore the world of Web3 decentralized applications like tokens, NFTs, DAOs, DeFi, the Metaverse, games, and so much more that is just being invented!
In our next post we will walk you through purchasing, listing, or trading your first Wapuu NFT!
